Showing posts with label men. Show all posts

Friday, 24 May 2013

Bathing Suit

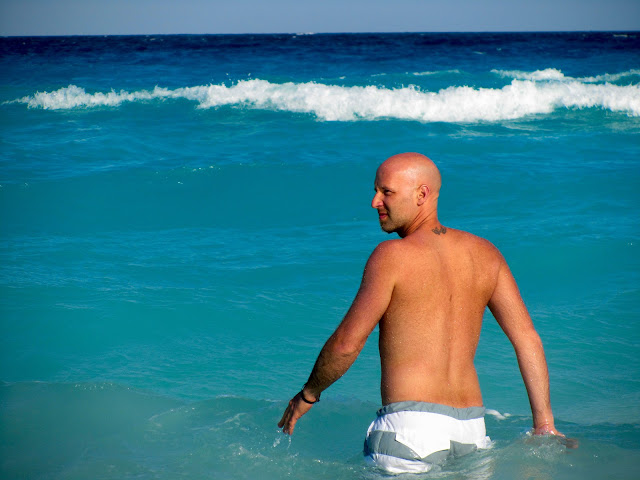
Hi Everyone, since this is supposed to be a sewing blog, here is a picture of me wearing a striped blue and white bathing suit, done myself, the only trouble i got with, is a forgot to attach the mesh pockets inside, so when the tide is there, pockets are turned to the outside.....
The photo has been taken in Cancun, Mexico.


Monday, 19 November 2012

Sculptures

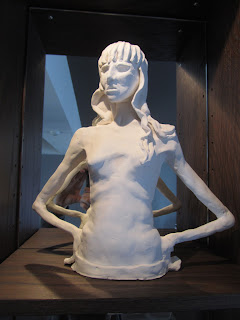
Hi Today I' showing sculptures made out of porcelain paper clay, they've been fired to cone 06, i'm not sure well, i don't know how i'm going to finished them. I don't think i'll put some color, may be leave them white, or put a white mate finish.... they are approx 15 inches tall.


Jérome

Daphnée
Byebye

Sylvain

Tuesday, 13 November 2012

Porcelain Bust


Hi, this is the beginning of me posting pictures of my new porcelain sculptures, most of them have been fired only once to cone 07. I use a porcelain paperclay from tucker.

These 3 bust are approx 8 inches tall, and they have been cover with a clear crackled glaze, then fired to cone 6.
The drops are oils paints. And i added some gold leaf in big chunks.
They can be purchased for 300$ (canadian) each.


New Stuff

Hi Everyone, today i want to share with you, a few things i've done not so recently...


These are encaustics paintings, I use natural beeswax that i purchased from a local beekeeper.
I prepared my encaustic by mixing beeswax with damar resin, and some pigments or simply oil paint.
They are 24 x 24 inches.
See you.

Tuesday, 7 August 2012

Concrete

Hi Folks, Here a few WIP of a new installation called ''FACE A FACE''.

As you can see, it is always a good idea to begin with a good armature!!! For my part it was quite good except for the arms, i could have done them a little bit stronger.

Oh and be careful to wear gloves, concrete can burn yourself....

The armature is a mix of wood, styro, wires, screws.


I put a layer of chicken wire to hold the concrete in place.

I covered the entire pieces with regular construction concrete, for about an inch thick.

Don't Look at my face on this one! It seems i have 3 chins...

The installation is complete.

When the sun goes down.

Lovers (who said they where lovers???) can meet in the light between them.
The Women weight is around 75 pounds while the men is around 100.

I did these pieces in the beginning of the summer. Since then, i did a lot of work in clay, they are fired but not ready to show. But Very soon...


Monday, 24 January 2011

How to copy your favorite Jeans Part 2

Welcome again!

This is part 2.
Now with the outline of the pattern it's time to redefine all the lines using a straight and a curved ruler. What you want is to have continous lines without breaking points, so it is going to be easy tu cut and sew in fabric.

Some times it is not possible to use any kind of ruler, so you just do it free hand.

Now the lines are clean, you can add sewing allowances.

With another piece of paper under, mark all the pockets, flaps, yokes, basically every piece of pattern you will need to make the jeans, add seam allowances and cut.
Now very important, you need to check the outside seam of the front panel with the outside seam of the back panel to see if they match! Do this also for the inside seam.

In my case they were not matching, so i needed to add a piece of paper to make the corrections.

Now I cut the fabric, if this is you first pattern you can try it with bad fabric to test your pattern, to day I feel I was in a good moon, so I went right away with the good fabric, an oatmeal corduroy.

How should you cut the corduroy??? Or any velvet???
You need to find the top of your piece of fabric, to find it rub the fabric with your hand, you need to find the rough way. The rough way is going down the pant or the dress, and the soft way is going up. Why is that? Because the color will be a lot nicer way. It is not very visible with corduroy, but for the velvet it makes a lot of difference. Try with 2 pieces of the same velvet, put them side by side one with the rough way going down and the other going up, you will see!!!


Now all you have left is to pin everything in place making sure to place grain lines correctly and cut.

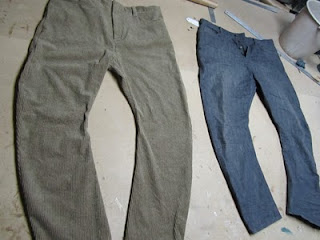
So here is the 2 jeans side by side, you can see there are some differences, because i did some modifications in the process, like make them longer, and a little bit wider at the bottom.
Don't forget, 2 fabrics dont ''fall'' the same with the same pattern, my corduroy was a lot ''softer'' and more ''dropping'' then the jeans, so the look is bit different.
Good luck with your project!

How to copy your favorite Jeans Part 1

You just bought a bran new pair of jeans and you know that these are the one you were looking for for century!!!!!
And you would like to have the pattern so you make one or two exactly the same?
Or you can do them in another fabric, or color?
So here is my way of doing so!
First here is the starting point a jeans bought at AllSAINTS, these are gray denim with a low crotch style,a twisted seam and a narrow leg.


So let's start!

Here is the jeans laying flat, as you can see the leg is kind of weird for a pant that is why I chose these ones...


On almost all kind of fabric if you look carefully, you can see the grain line of the fabric, here I ''Marked'' with a needle and white thread the grain line of the front panel and I did the same for the back panel also.

Now, take a piece of paper, it needs to be big enough to do the entire piece of pattern for the front leg. I like to place it on top of a towel or something similar, it makes a kind of cushion underneath so we'll be able to make tiny holes with a pin or a needles roller. Oh and dont do this on you nice kitchen table....your mother will be very angry at you and you won't like if that happens...


With a pencil and a yard, draw a line, this will be your grain line. Then place your jean on top of this line and pin the jeans here and there to match the 2 grain lines together.

Then start marking the contour of the jeans.

But you're asking what to do when the sewing goes under....

Here is my trick!


After marking the contour, with a pin I marked the fold line of the fabric. And when i turn the bottom of the leg i can see how much fabric was folded underneath!!! I just need to mesure (in my case 1 inch) and add this inch to my pattern.


Do this every time your seam switch side!! For me the 2 sides were not the same


On the next picture I marked with a needlle the ''point where the seam is right on the edge of the folding.

Now the seam is on top, this is easy, you just need to use a needles roller, and pass over the seams.


Mark Everything you can mark with the needles roller. Don't forget to mark the end of the zipper


And the front pocket!


Now you can do the same for the back leg pattern.


So here is the end of part 1, part 2 is following...
Thursday, 8 July 2010

A Newbie in the Blog world..

I Don't know where to start....well let's say, i'm a 39 years old guy, who like to experiment with art supply, but espacially with fabric. Over the years i've been doing a lots of things with fabric, but guess what??? I HAVE NO PICTURE!!! I have almost no picture of things i've done... so that is (partially) why, i'm starting this blog, so i will need to post here and there pictures of my success (unsuccess!).

I' ve always a few things on the way...


So here are a few things going on right now, but not necessary in that order.

I have always a lots of fabrics on hands, so i can always sew a shirt or two...Last week i bought some wool, to make pants and vest, i'll show you what i want to do with..

I've started a few months ago, some needle sculpting faces, for some kind of dolls...

I would like to make a lampshade for that 70's lampbase i found at the flea market.

I want to do some pillow for the couch, but with pictures ironed on them, i already tried but made a mess out of it..

Anyway, we'll see how things will go on...

See ya